First Adversary
 First Adversary First Adversary | |
|---|---|
 | |
| Prequest | [Odium] Hundun Laid to Rest |
 | |
| Entry Level | 270+ |
| Party Size | 1 - 3 |
| Required Force / Power | ⬢220 SAC / AUT |
| Potion Cooldown | 10 seconds |
| Time Limit | 30 minutes |
| Death Count | None (see Adversarial Will) |
| Clear Limit | 1 clear every week (shared with Normal, Hard, Extreme) |
| Required Combat Power (CMS) | Total or 1-Person: 50,000,000 2-Person: |
 | |
| Entry Level | 270+ |
| Party Size | 1 - 3 |
| Required Force / Power | ⬢320 SAC / AUT |
| Potion Cooldown | 10 seconds |
| Time Limit | 30 minutes |
| Death Count | None (see Adversarial Will) |
| Clear Limit | 1 clear every week (shared with Easy, Hard, Extreme) |
| Required Combat Power (CMS) | Total or 1-Person: 150,000,000 2-Person: |
 | |
| Entry Level | 270+ |
| Party Size | 1 - 3 |
| Required Force / Power | ⬢340 SAC / AUT |
| Potion Cooldown | 10 seconds |
| Time Limit | 30 minutes |
| Death Count | None (see Adversarial Will) |
| Clear Limit | 1 clear every week (shared with Easy, Normal, Extreme) |
| Required Combat Power (CMS) | Total or 1-Person: 900,000,000 2-Person: |
 | |
| Entry Level | 270+ |
| Party Size | 1 - 3 |
| Required Force / Power | ⬢460 SAC / AUT |
| Potion Cooldown | 10 seconds |
| Time Limit | 30 minutes |
| Death Count | None (see Adversarial Will) |
| Clear Limit | 1 clear every week (shared with Easy, Normal, Hard) |
| Required Combat Power (CMS) | Total or 1-Person: 2,500,000,000 2-Person: |
| Name (Other Servers) | |
| KoreaMS | 최초의 대적자 (First Adversary) |
| JapanMS | 最初の対敵者 (First Adversary) |
| ChinaMS | 最初的对抗者 (First Adversary) |
| TaiwanMS | 最初的敵對者 (First Adversary) |
| MapleSEA | The First Adversary |
The First Adversary is the final boss of Odium, the Awakened Laboratory, whose spirit resides in the World Heart. Upon receiving the World Heart from Hundun, the First Adversary will test you before you gain the World Heart's power.
Battle Overview
The First Adversary can be fought in Easy, Normal, Hard, and Extreme mode. To deal regular damage to the boss, ⬢Sacred Power / Authentic Force (SAC / AUT) is required. Easy mode requires a minimum of ⬢220 SAC / AUT for each phase, Normal mode requires a minimum of ⬢320 SAC / AUT, Hard mode requires a minimum of ⬢340 SAC / AUT for each phase, and Extreme mode requires a minimum of ⬢460 SAC / AUT for each phase. Story Mode requires a minimum of ⬢100 SAC / AUT. You will deal -10% final damage for every 10 SAC / AUT below the required amount; if you have 100 or more SAC / AUT below the required amount, you will only deal a total of 5% final damage. Similarly, you will deal +5% final damage for every 10 SAC / AUT above the required amount, up to +25% (50 above).
In addition, you will deal 20% more damage to First Adversary if your Sacred Symbol: Odium is at level 11.
You must be in a party of 1 - 3 players in order to fight him. The battle has a time limit of 30 minutes, and a Potion Cooldown of 10 seconds is applied. All attacks deal % HP damage, so they must be manually avoided, as it ignores any avoidability stats, and damage reduction skills (unless the skill is specifically stated to include damage proportional to HP). There are 3 phases.
NOTE: Most damage values will vary based on difficulty, and will be listed in order from lowest difficulty to highest. Example: if listed as 20% / 25% / 30% / 35%, then the 20% correlates to Easy mode, the 25% correlates to Normal mode, the 30% correlates to Hard mode, and 35% correlates to Extreme mode. If there are no listed values, then it is the same regardless of difficulty unless stated otherwise.
All Phases
Adversarial Will
-
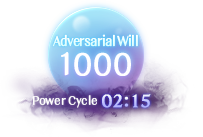 Adversarial Will Value

Unlike other bosses with a death counter, each party member will instead receive a separate Adversarial Will Value counter. You will start with a value of 1,000, and if it decreases to 0, you will die and be kicked out of the fight. It can decrease by 100 or 200 based on the Power Cycle pattern that the boss uses in each phase. You will lose 200 Adversarial Will if you die at any point during the battle.
Power of Order
-
 Power of Order Gauge, filled to 400 / 1,000
 -
 Power of Order Gauge, filled to 1,000

.png)
The Power of Order gauge is shared among all party members, starting at 500. It decreases by 5 every second, and will also decrease when any player is hit by strong patterns (Easy and Normal) or all patterns (Hard and Extreme). However, it will also increase when successfully parrying patterns (see Immortal Will section). The amount affects how much final damage is earned/lost every time the Power Cycle is triggered (see Power Cycle section).
Power Cycle
The timer on the Adversarial Will icon indicates when a Power Cycle is triggered. It occurs around every 2 minutes and 17 seconds, and when there's 4 seconds left, there will be a warning message that says "The Godsphere reverberates with energy. The end is nigh.". Once the Power Cycle triggers, a cutscene covering the entire screen will play, making all players and the First Adversary invincible during the duration of it, and removes all debuffs the First Adversary has. All players will also be granted a final damage buff or debuff, and may lose Adversarial Will based on how much the Power of Order Gauge is filled. If the Power of Order Gauge falls below 500 during this time, it will return back to 500. Below is a table that lists how much final damage is gained/lost and Adversarial Will lost based on how much the Power of Order Gauge is filled when a Power Cycle is triggered.
| Power of Order Amount | Final Damage Change | Adversarial Will Lost |
|---|---|---|
| 800-1000 | +20% | 0 |
| 600-799 | +10% | 0 |
| 400-599 | +0% | 0 |
| 200-399 | -10% | 100 |
| 0-199 | -20% | 200 |
Immortal Will
Also known as parrying, this skill is activated by hitting the Harvest/Interact key. When used, the player will attempt a parry for 0.5 seconds. The skill has a cooldown of 6 seconds. When a pattern is successfully parried, a sound effect will play, the player will not take damage, and the cooldown is reduced by 4.5 seconds. The Power of Order gauge will increase only if a "strong" pattern is parried; any other pattern will not affect the gauge, indicated by a weaker sound effect if the parry was successful. This skill can still be used while the player is invincible to increase the Power of Order gauge.
Phase 1
The fight will take place on a flat, open area with no additional platforms.
- Lasers: Throughout the map, there will be small lines appearing to indicate a warning mark, and then 1.20 seconds later, a laser will be shot. Deals 10% HP damage and decreases Power of Order by 0 / 0 / 5 / 10.
- Tornado: If the Power of Order gauge is above 800, tornados are spawned on the left and right corners of the map. Coming into contact deals 25% HP damage every second, inflicts Slow, and decreases Power of Order by 0 / 0 / 10 / 20.
- Warrior's Mark: A crosshair will follow a targeted player, stop after 2.72 seconds, and then turn into a stationary slashing attack. Getting hit deals 15% HP damage, inflicts Potion Lock, and decreases Power of Order by 0 / 0 / 5 / 10.
- Teleport Slash: The First Adversary will teleport to a random player and slash with his sword. Deals 30% / 30% / 30% / 80% HP damage, inflicts Stun, and decreases Power of Order by 0 / 0 / 30 / 50.
- Double Slash: The First Adversary will do a side slash, pause for a second, and then a strong overhead slash. The first slash will deal 30% HP damage and decrease Power of Order by 0 / 0 / 30 / 30. The second slash will deal 50% / 50% / 50% / 80% HP damage and decrease Power of Order by 200 / 200 / 200 / 300. Parrying the second slash will increase Power of Order by 100 / 75 / 75 / 75. Both slashes can be crouched under.
- Triple Slash: The First Adversary will do two quick side slashes, charge up his sword, and then a strong overhead slash. Getting hit by any of the first two slashes will deal 20% HP damage and decrease Power of Order by 0 / 0 / 15 / 15. They can be crouched under. Getting hit by the last slash will deal 50% / 50% / 50% / 80% HP damage, inflict Super Knockback, and decrease Power of Order by 200 / 200 / 200 / 300. Parrying this attack will increase Power of Order by 100 / 75 / 75 / 75.
- Sword Storm: A warning message saying "An innumerable amount of swords will rain down. Find a way off the ground." will appear and the First Adversary will summon a bunch of swords flying up into the air. Once they stop rising, they will rain down to the ground, lingering for about 1.98 seconds before exploding. Getting hit by the swords when they rain down will deal 90% damage and decrease Power of Order by 0 / 0 / 60 / 100. Getting hit by the swords when they explode deal 1000% HP damage and decrease Power of Order by 200 / 200 / 400 / 500. Parrying this will increase Power of Order by 200. Both attacks can be dodged by up jumping, however you need to be at the edge of the top to avoid the second blow.
- Dash: The First Adversary will dash forward once or three times, and may have a clone accompanying him. The clone will appear behind him and will always dash first before the First Adversary will follow. Below is every situation that can happen per dash. Note that the clone can only appear on the first and third dash, and First Adversary cannot dash exactly two times; only once or three times.
- Single Dash: If the clone appears, it will dash forward, dealing 20% HP damage, decreasing Power of Order by 0 / 0 / 30 / 50, and inflicting Super Knockback and Stun. You can crouch under it. If getting hit by First Adversary when he dashes, he deals 50% / 50% / 50% / 80% HP damage, decreases Power of Order by 200 / 200 / 200 / 300, and inflicts Stun and Super Knockback. Parrying this attack will increase Power of Order by 100 / 75 / 75 / 75. You cannot crouch under this attack. Parrying it will increase Power of Order by 100 / 75 / 75 / 75.
- Triple Dash: If the clone appears, it will dash forward, dealing 20% HP damage, and inflicting Super Knockback and Stun. You can crouch under it. If getting hit by the First Adversary's dash, he deals 50% / 50% / 50% / 80% HP damage, and inflicting Super Knockback. You cannot crouch under this attack. The First Adversary will dash a second time, dealing 30% HP damage, and inflicting Super Knockback. This can be crouched under. If the clone appears for the third dash, it will deal 20% damage, and inflict Super Knockback and Stun. Getting hit by First Adversary's third dash will deal 50% / 50% / 50% / 80% HP damage, and inflict Super Knockback. Both can be avoided by up jumping. Getting hit by the clone or the second dash will decrease Power of Order by 0 / 0 / 30 / 50. Getting hit by First Adversary's first or third dash will decrease Power of Order by 200 / 200 / 200 / 300. Conversely, parrying those attacks will increase Power of Order by 100 / 75 / 75 / 75.
- Powerful Strike: A warning message saying "A powerful strike will rend this battleground apart. Identify the main body quickly." will appear, the First Adversary will spawn two clones of himself, and they will appear on each third of the map in a stance, with the real Adversary having a quick red flash on him to indicate which one is him. After about 2 seconds, they will move and then explode, covering the entire map. Getting hit by any clones will deal 80% HP damage and decrease Power of Order by 0 / 0 / 60 / 100. Getting hit by the First Adversary will deal 999% HP damage and decrease Power of Order by 200 / 200 / 400 / 500. Parrying him will increase Power of Order by 200.
Phase 2
The map will now have two platforms on the left and right side of the map, and portals to warp between the top and bottom floors. The First Adversary will be stationary in the middle of the map. Every player will be assigned an element of Fire, Ice, or Holy. Players must parry the matching element of the attacks in order to increase the Power of Order. When Power Cycle is triggered, every player will get a different element.
- Infinity Pillars: A bunch of elemental pillars will appear around the map and show an animation identical to Infinity before exploding. Getting hit deals 30% / 30% / 30% / 50% HP damage and decreases Power of Order by 50 / 50 / 100 / 150. Parrying the correct element will increase Power of Order by 100.
- Debris: A column of light will mark a spot, and one second after the column disappears, a debris will fall. Getting hit will deal 30% / 30% / 30% / 50% HP damage, decrease Power of Order by 0 / 0 / 50 / 150, and inflict Stun.
- Altar: A random player is targeted by a crosshair that will follow the player. After 5.48 seconds, an altar will appear at the spot the player was, constantly dealing 15% / 15% / 15% / 30% damage and decreasing Power of Order by 0 / 0 / 50 / 150 while standing inside of it. It will stay for 25 seconds before vanishing and choosing another target.
- Elemental Vortex: A warning message saying "Elemental vortexes will beam down from the heavens. Avoid them and take cover." will appear, and the First Adversary will have three elemental marks appear in a Y shape around him, with arrows around him indicating the direction these marks will go. The marks will then become lasers that will rotate in a clockwise or counter-clockwise direction. Getting hit by any of the lasers will deal 15% / 15% / 15% / 80% damage and decrease Power of Order by 200 / 200 / 200 / 300. Parrying the correct element will increase Power of Order by 150 / 100 / 100 / 100. Teleporting or using the portals can avoid this attack.
- Elemental Torrent: A warning message saying "Protect yourself from the incoming torrent of elemental power." will appear, and columns will appear with gaps on the ground or top floor. There will be arrows in the gaps to indicate which way the columns will go. The columns will become lasers that will move left or right. Getting hit by any of the lasers will deal 15% / 15% / 15% / 80% HP damage and decrease Power of Order by 200 / 200 / 200 / 300. Parrying the correct element will increase Power of Order by 150 / 100 / 100 / 100. Use the portals linking the top and ground floor to avoid getting hit.
- Homing Arrows: The First Adversary will fire arrows matching the player's element to home in on them. Every arrow deals 10% / 10% / 10% / 20% HP damage and decreases Power of Order by 10 / 10 / 20 / 30. Parrying the arrows will only increase Power of Order once, by 125 / 100 / 100 / 100.
- Scattering Arrows: The First Adversary will take aim with a bow and then shoot arrows. The arrows will bounce around all over the map, splitting into smaller arrows when hitting the edge of the map. The large arrow deals 50% HP damage and small arrows deal 10% damage. Both will decrease the Power of Order by 0 / 0 / 50 / 100. This attack can be avoided by standing at the bottom portal behind the First Adversary from where he is facing before he fires.
- Fury of the Wild: A large Fury of the Wild is summoned above the First Adversary. It will move its wings to indicate where it's attacking, and after a few seconds, will swing its wings to strike. Getting hit will deal 40% / 40% / 40% / 80% HP damage, inflict Super Knockback, and decrease Power of Order by 0 / 0 / 100 / 200.
- If both wings are folded, it will attack the entire center of the map. Players must be past the portal to avoid it.
- If both wings are spread, it will attack the outer thirds of the map. Players must be past the portal to avoid it.
- If the left wing is folded, it will attack the left half of the map.
- If the right wing is folded, it will attack the right half of the map.
- Snipe: A crosshair will appear on the player. After a few seconds, the First Adversary will fire a volley of arrows 6 times, pausing, and then firing an elemental arrow afterwards. Every arrow shot will cause him to rotate his aim slightly. Getting hit by any of the first 6 arrows deal 20% / 20% / 20% / 40% HP damage and decrease Power of Order by 0 / 0 / 50 / 100. Getting hit by the elemental arrow will deal 50% / 50% / 50% / 999% HP damage and decrease Power of Order by 200 / 200 / 400 / 500. Parrying it will increase Power of Order by 250 / 200 / 200 / 200. Players can avoid this attack by simply using Blink and floating where the First Adversary is, or be on the opposite side of First Adversary's aim, as he cannot rotate far enough to reach the player during the first 6 arrows.
Phase 3
The map returns to a flat open area identical to Phase 1, with the First Adversary also moving around as well. Aspects of the first two phases can be found here, such as the same patterns from phase 1 and the elemental assignment from phase 2.
- Lasers: Same as phase 1, but they shoot in 1 second, dealing 15% HP damage and decreasing Power of Order by 0 / 0 / 5 / 15.
- Teleport Slash: Same as phase 1 with the exact same damage and Power of Order decrease and inflicting Stun.
- Triple Slash: The First Adversary will do the Double Slash from phase 1, but then charge up a strong side slash afterwards. Getting hit by the first slash deals 30% HP damage and decreases Power of Order by 0 / 0 / 30 / 50. Unlike in phase 1, the second slash can't be crouched under, and a random element will be chosen for it based on what color the sword is glowing before First Adversary attacks. Deals 50% / 50% / 50% / 80% HP damage, decreases Power of Order by 200 / 200 / 200 / 150, and inflicts Super Knockback. Parrying it with the correct element increases Power of Order by 100 / 75 / 75 / 75. The third slash will be all elements, and getting hit deals 50% / 50% / 50% / 200% HP damage, decreases Power of Order by 200 / 200 / 200 / 300, and inflicts Super Knockback. Parrying it increases Power of Order by 100 / 75 / 75 / 75.
- Quad Slash: The First Adversary will do the Triple Slash from phase 1, but then charge up a strong side slash afterwards. Getting hit by any of the first two slashes deal 20% HP damage and decrease Power of Order by 0 / 0 / 15 / 25. A random element will be chosen for the third slash, based on what color the sword is glowing before First Adversary attacks. Getting hit deals 50% / 50% / 50% / 80% HP damage and decreases Power of Order by 200 / 200 / 200 / 150. Parrying it with the correct element increases Power of Order by 100 / 75 / 75 / 75. The fourth slash will be all elements, and getting hit deals 50% / 50% / 50% / 200% HP damage, inflicts Super Knockback, and decreases Power of Order by 200 / 200 / 200 / 300. Parrying it will increase Power of Order by 100 / 75 / 75 / 75.
- Triple Dash: Functions the same as Triple Dash from phase 1. The first dash will be a Fire attack, and unlike in phase 1, can be crouched under. The second dash will be an Ice attack. The third dash will be a Holy attack. Getting hit by any clones will deal 20% HP damage, decrease Power of Order by 0 / 0 / 30 / 50, and inflict Super Knockback and Stun. Getting hit by First Adversary will deal 50% / 50% / 50% / 80% HP damage, decrease Power of Order by 200 / 200 / 200 / 300, and inflict Super Knockback. Parrying the correct elemental dash will increase Power of Order by 200 / 150 / 150 / 150.
- Elemental Beams: A warning message saying "Concentrated elemental beams will sweep the earth. Stop the flow." will appear, and three insignias containing each element will appear at the top of the map. A warning mark from one insignia will target and follow a random player, before becoming a laser and tracking the target. The laser lasts a few seconds. Getting hit deals 20% / 20% / 20% / 50% HP damage and decreases Power of Order by 30 / 30 / 30 / 50 per tick. Parrying the correct element increases Power of Order by 250 / 200 / 200 / 200 and nullifies the laser. The First Adversary can still attack while these lasers are ongoing.
- Arrow Shower: A warning message saying "An endless shower of arrows devastates the battleground." will appear, and the First Adversary will rapidly shoot arrows into the sky, causing them to rain back down. There will be a quick warning mark to indicate where an arrow will fall. Getting hit deals 45% / 45% / 45% / 60% HP damage and decreases Power of Order by 0 / 0 / 50 / 100.
Monster
Odium
Easy
Easy difficulty was added into the game during the Assemble / Every Little Thing Every Precious Thing Update Part 3. It has a total of 570,000,000,000,000 (570 trillion) HP.
Easy: Phase 1
Required SAC / AUT: ⬢220
 Adversary's Valor (Boss) Adversary's Valor (Boss)
| ||||||||||||||||||||||

| ||||||||||||||||||||||
| Level | 270 | HP | 171,000,000,000,000[1] | MP | 100,000 | EXP | 0 | |||||||||||||||
|---|---|---|---|---|---|---|---|---|---|---|---|---|---|---|---|---|---|---|---|---|---|---|
| Attack | 22,000 | Defense Rate | PDR: 380% MDR: 380% |
Speed | -20 | Additional Points | None | |||||||||||||||
| Elements | ||||||||||||||||||||||
 Fire Fire
|
Resistant |  Ice Ice
|
Resistant | |||||||||||||||||||
 Poison Poison
|
Resistant |  Lightning Lightning
|
Resistant | |||||||||||||||||||
 Holy Holy
|
Resistant |  Dark Dark
|
Resistant | |||||||||||||||||||
 Physical Physical
|
Resistant |  Undead? Undead?
|
No | |||||||||||||||||||
| Other | ||||||||||||||||||||||
| Category | Enchanted | |||||||||||||||||||||
| Equipment Drops | None | |||||||||||||||||||||
| Usable Drops | None | |||||||||||||||||||||
| Set-up Drops | None | |||||||||||||||||||||
| Etc. Drops | None | |||||||||||||||||||||
| Quest Drops | None | |||||||||||||||||||||
| Locations | Bountiful Bravery | |||||||||||||||||||||
Easy: Phase 2
Required SAC / AUT: ⬢220
 Adversary's Conviction (Boss) Adversary's Conviction (Boss)
| ||||||||||||||||||||||

| ||||||||||||||||||||||
| Level | 270 | HP | 171,000,000,000,000[1] | MP | 100,000 | EXP | 0 | |||||||||||||||
|---|---|---|---|---|---|---|---|---|---|---|---|---|---|---|---|---|---|---|---|---|---|---|
| Attack | 22,000 | Defense Rate | PDR: 380% MDR: 380% |
Speed | Stationary | Additional Points | None | |||||||||||||||
| Elements | ||||||||||||||||||||||
| Fire
|
Resistant | Ice
|
Resistant | |||||||||||||||||||
| Poison
|
Resistant | Lightning
|
Resistant | |||||||||||||||||||
| Holy
|
Resistant | Dark
|
Resistant | |||||||||||||||||||
| Physical
|
Resistant | Undead?
|
No | |||||||||||||||||||
| Other | ||||||||||||||||||||||
| Category | Enchanted | |||||||||||||||||||||
| Equipment Drops | None | |||||||||||||||||||||
| Usable Drops | None | |||||||||||||||||||||
| Set-up Drops | None | |||||||||||||||||||||
| Etc. Drops | None | |||||||||||||||||||||
| Quest Drops | None | |||||||||||||||||||||
| Locations | Truth in Wisdom | |||||||||||||||||||||
Easy: Phase 3
Required SAC / AUT: ⬢220
 First Adversary (Boss) First Adversary (Boss)
| ||||||||||||||||||||||
|
| ||||||||||||||||||||||
| Level | 270 | HP | 228,000,000,000,000[1] | MP | 100,000 | EXP | 0 | |||||||||||||||
|---|---|---|---|---|---|---|---|---|---|---|---|---|---|---|---|---|---|---|---|---|---|---|
| Attack | 22,000 | Defense Rate | PDR: 380% MDR: 380% |
Speed | -20 | Additional Points | None | |||||||||||||||
| Elements | ||||||||||||||||||||||
| Fire
|
Resistant | Ice
|
Resistant | |||||||||||||||||||
| Poison
|
Resistant | Lightning
|
Resistant | |||||||||||||||||||
| Holy
|
Resistant | Dark
|
Resistant | |||||||||||||||||||
| Physical
|
Resistant | Undead?
|
No | |||||||||||||||||||
| Other | ||||||||||||||||||||||
| Category | Enchanted | |||||||||||||||||||||
| Equipment Drops | None | |||||||||||||||||||||
| Usable Drops | None | |||||||||||||||||||||
| Set-up Drops | None | |||||||||||||||||||||
| Etc. Drops | None | |||||||||||||||||||||
| Quest Drops | None | |||||||||||||||||||||
| Locations | Fated to be Legend | |||||||||||||||||||||
Easy: Reward
| World Heart (Boss) | ||||||||||||||||||||||

| ||||||||||||||||||||||
| Level | 270 | HP | 100,000 | MP | 10,000,000 | EXP | 0 | |||||||||||||||
|---|---|---|---|---|---|---|---|---|---|---|---|---|---|---|---|---|---|---|---|---|---|---|
| Attack | 22,000 | Defense Rate | PDR: 380% MDR: 380% |
Speed | Stationary | Additional Points | Ambition EXP: 388 Weapon Points: 300 Guild Points: 3,000 Party GP Bonus: 6,000 | |||||||||||||||
| Elements | ||||||||||||||||||||||
| Fire
|
Resistant | Ice
|
Resistant | |||||||||||||||||||
| Poison
|
Resistant | Lightning
|
Resistant | |||||||||||||||||||
| Holy
|
Resistant | Dark
|
Resistant | |||||||||||||||||||
| Physical
|
Resistant | Undead?
|
No | |||||||||||||||||||
| Other | ||||||||||||||||||||||
| Category | Enchanted | |||||||||||||||||||||
| Fixed Damage | 1,000 | |||||||||||||||||||||
| Equipment Drops | None | |||||||||||||||||||||
| Usable Drops |
| |||||||||||||||||||||
| Set-up Drops | None | |||||||||||||||||||||
| Etc. Drops |
| |||||||||||||||||||||
| Quest Drops | None | |||||||||||||||||||||
| Locations | Where Will is Forged | |||||||||||||||||||||
Normal
Normal difficulty was added into the game during the Assemble / Every Little Thing Every Precious Thing Update Part 3. It has a total of 1,650,000,000,000,000 (1.65 quadrillion) HP.
Normal: Phase 1
Required SAC / AUT: ⬢320
| Adversary's Valor (Boss)
| ||||||||||||||||||||||
|
| ||||||||||||||||||||||
| Level | 280 | HP | 495,000,000,000,000[1] | MP | 100,000 | EXP | 0 | |||||||||||||||
|---|---|---|---|---|---|---|---|---|---|---|---|---|---|---|---|---|---|---|---|---|---|---|
| Attack | 22,000 | Defense Rate | PDR: 380% MDR: 380% |
Speed | -20 | Additional Points | None | |||||||||||||||
| Elements | ||||||||||||||||||||||
| Fire
|
Resistant | Ice
|
Resistant | |||||||||||||||||||
| Poison
|
Resistant | Lightning
|
Resistant | |||||||||||||||||||
| Holy
|
Resistant | Dark
|
Resistant | |||||||||||||||||||
| Physical
|
Resistant | Undead?
|
No | |||||||||||||||||||
| Other | ||||||||||||||||||||||
| Category | Enchanted | |||||||||||||||||||||
| Equipment Drops | None | |||||||||||||||||||||
| Usable Drops | None | |||||||||||||||||||||
| Set-up Drops | None | |||||||||||||||||||||
| Etc. Drops | None | |||||||||||||||||||||
| Quest Drops | None | |||||||||||||||||||||
| Locations | Bountiful Bravery | |||||||||||||||||||||
Normal: Phase 2
Required SAC / AUT: ⬢320
| Adversary's Conviction (Boss)
| ||||||||||||||||||||||
|
| ||||||||||||||||||||||
| Level | 280 | HP | 495,000,000,000,000[1] | MP | 100,000 | EXP | 0 | |||||||||||||||
|---|---|---|---|---|---|---|---|---|---|---|---|---|---|---|---|---|---|---|---|---|---|---|
| Attack | 22,000 | Defense Rate | PDR: 380% MDR: 380% |
Speed | Stationary | Additional Points | None | |||||||||||||||
| Elements | ||||||||||||||||||||||
| Fire
|
Resistant | Ice
|
Resistant | |||||||||||||||||||
| Poison
|
Resistant | Lightning
|
Resistant | |||||||||||||||||||
| Holy
|
Resistant | Dark
|
Resistant | |||||||||||||||||||
| Physical
|
Resistant | Undead?
|
No | |||||||||||||||||||
| Other | ||||||||||||||||||||||
| Category | Enchanted | |||||||||||||||||||||
| Equipment Drops | None | |||||||||||||||||||||
| Usable Drops | None | |||||||||||||||||||||
| Set-up Drops | None | |||||||||||||||||||||
| Etc. Drops | None | |||||||||||||||||||||
| Quest Drops | None | |||||||||||||||||||||
| Locations | Truth in Wisdom | |||||||||||||||||||||
Normal: Phase 3
Required SAC / AUT: ⬢320
| First Adversary (Boss)
| ||||||||||||||||||||||
|
| ||||||||||||||||||||||
| Level | 280 | HP | 660,000,000,000,000[1] | MP | 100,000 | EXP | 0 | |||||||||||||||
|---|---|---|---|---|---|---|---|---|---|---|---|---|---|---|---|---|---|---|---|---|---|---|
| Attack | 22,000 | Defense Rate | PDR: 380% MDR: 380% |
Speed | -20 | Additional Points | None | |||||||||||||||
| Elements | ||||||||||||||||||||||
| Fire
|
Resistant | Ice
|
Resistant | |||||||||||||||||||
| Poison
|
Resistant | Lightning
|
Resistant | |||||||||||||||||||
| Holy
|
Resistant | Dark
|
Resistant | |||||||||||||||||||
| Physical
|
Resistant | Undead?
|
No | |||||||||||||||||||
| Other | ||||||||||||||||||||||
| Category | Enchanted | |||||||||||||||||||||
| Equipment Drops | None | |||||||||||||||||||||
| Usable Drops | None | |||||||||||||||||||||
| Set-up Drops | None | |||||||||||||||||||||
| Etc. Drops | None | |||||||||||||||||||||
| Quest Drops | None | |||||||||||||||||||||
| Locations | Fated to be Legend | |||||||||||||||||||||
Normal: Reward
| World Heart (Boss) | ||||||||||||||||||||||
|
| ||||||||||||||||||||||
| Level | 280 | HP | 100,000 | MP | 10,000,000 | EXP | 0 | |||||||||||||||
|---|---|---|---|---|---|---|---|---|---|---|---|---|---|---|---|---|---|---|---|---|---|---|
| Attack | 22,000 | Defense Rate | PDR: 380% MDR: 380% |
Speed | Stationary | Additional Points | Ambition EXP: 388 Weapon Points: 300 Guild Points: 3,000 Party GP Bonus: 6,000 | |||||||||||||||
| Elements | ||||||||||||||||||||||
| Fire
|
Resistant | Ice
|
Resistant | |||||||||||||||||||
| Poison
|
Resistant | Lightning
|
Resistant | |||||||||||||||||||
| Holy
|
Resistant | Dark
|
Resistant | |||||||||||||||||||
| Physical
|
Resistant | Undead?
|
No | |||||||||||||||||||
| Other | ||||||||||||||||||||||
| Category | Enchanted | |||||||||||||||||||||
| Fixed Damage | 1,000 | |||||||||||||||||||||
| Equipment Drops | Adversaryroid | |||||||||||||||||||||
| Usable Drops |
| |||||||||||||||||||||
| Set-up Drops | None | |||||||||||||||||||||
| Etc. Drops |
| |||||||||||||||||||||
| Quest Drops | None | |||||||||||||||||||||
| Locations | Where Will is Forged | |||||||||||||||||||||
Hard
Hard difficulty was added into the game during the Assemble / Every Little Thing Every Precious Thing Update Part 3. It has a total of 10,450,000,000,000,000 (10.45 quadrillion) HP.
Hard: Phase 1
Required SAC / AUT: ⬢340
| Adversary's Valor (Boss)
| ||||||||||||||||||||||
|
| ||||||||||||||||||||||
| Level | 285 | HP | 3,135,000,000,000,000[1] | MP | 100,000 | EXP | 0 | |||||||||||||||
|---|---|---|---|---|---|---|---|---|---|---|---|---|---|---|---|---|---|---|---|---|---|---|
| Attack | 22,000 | Defense Rate | PDR: 380% MDR: 380% |
Speed | -20 | Additional Points | None | |||||||||||||||
| Elements | ||||||||||||||||||||||
| Fire
|
Resistant | Ice
|
Resistant | |||||||||||||||||||
| Poison
|
Resistant | Lightning
|
Resistant | |||||||||||||||||||
| Holy
|
Resistant | Dark
|
Resistant | |||||||||||||||||||
| Physical
|
Resistant | Undead?
|
No | |||||||||||||||||||
| Other | ||||||||||||||||||||||
| Category | Enchanted | |||||||||||||||||||||
| Equipment Drops | None | |||||||||||||||||||||
| Usable Drops | None | |||||||||||||||||||||
| Set-up Drops | None | |||||||||||||||||||||
| Etc. Drops | None | |||||||||||||||||||||
| Quest Drops | None | |||||||||||||||||||||
| Locations | Bountiful Bravery | |||||||||||||||||||||
Hard: Phase 2
Required SAC / AUT: ⬢340
| Adversary's Conviction (Boss)
| ||||||||||||||||||||||
|
| ||||||||||||||||||||||
| Level | 285 | HP | 3,135,000,000,000,000[1] | MP | 100,000 | EXP | 0 | |||||||||||||||
|---|---|---|---|---|---|---|---|---|---|---|---|---|---|---|---|---|---|---|---|---|---|---|
| Attack | 22,000 | Defense Rate | PDR: 380% MDR: 380% |
Speed | Stationary | Additional Points | None | |||||||||||||||
| Elements | ||||||||||||||||||||||
| Fire
|
Resistant | Ice
|
Resistant | |||||||||||||||||||
| Poison
|
Resistant | Lightning
|
Resistant | |||||||||||||||||||
| Holy
|
Resistant | Dark
|
Resistant | |||||||||||||||||||
| Physical
|
Resistant | Undead?
|
No | |||||||||||||||||||
| Other | ||||||||||||||||||||||
| Category | Enchanted | |||||||||||||||||||||
| Equipment Drops | None | |||||||||||||||||||||
| Usable Drops | None | |||||||||||||||||||||
| Set-up Drops | None | |||||||||||||||||||||
| Etc. Drops | None | |||||||||||||||||||||
| Quest Drops | None | |||||||||||||||||||||
| Locations | Truth in Wisdom | |||||||||||||||||||||
Hard: Phase 3
Required SAC / AUT: ⬢340
| First Adversary (Boss)
| ||||||||||||||||||||||
|
| ||||||||||||||||||||||
| Level | 285 | HP | 4,180,000,000,000,000[1] | MP | 100,000 | EXP | 0 | |||||||||||||||
|---|---|---|---|---|---|---|---|---|---|---|---|---|---|---|---|---|---|---|---|---|---|---|
| Attack | 22,000 | Defense Rate | PDR: 380% MDR: 380% |
Speed | -20 | Additional Points | None | |||||||||||||||
| Elements | ||||||||||||||||||||||
| Fire
|
Resistant | Ice
|
Resistant | |||||||||||||||||||
| Poison
|
Resistant | Lightning
|
Resistant | |||||||||||||||||||
| Holy
|
Resistant | Dark
|
Resistant | |||||||||||||||||||
| Physical
|
Resistant | Undead?
|
No | |||||||||||||||||||
| Other | ||||||||||||||||||||||
| Category | Enchanted | |||||||||||||||||||||
| Equipment Drops | None | |||||||||||||||||||||
| Usable Drops | None | |||||||||||||||||||||
| Set-up Drops | None | |||||||||||||||||||||
| Etc. Drops | None | |||||||||||||||||||||
| Quest Drops | None | |||||||||||||||||||||
| Locations | Fated to be Legend | |||||||||||||||||||||
Hard: Reward
| World Heart (Boss) | ||||||||||||||||||||||
|
| ||||||||||||||||||||||
| Level | 285 | HP | 100,000 | MP | 10,000,000 | EXP | 0 | |||||||||||||||
|---|---|---|---|---|---|---|---|---|---|---|---|---|---|---|---|---|---|---|---|---|---|---|
| Attack | 22,000 | Defense Rate | PDR: 380% MDR: 380% |
Speed | Stationary | Additional Points | Ambition EXP: 388 Weapon Points: 300 Guild Points: 3,000 Party GP Bonus: 6,000 | |||||||||||||||
| Elements | ||||||||||||||||||||||
| Fire
|
Resistant | Ice
|
Resistant | |||||||||||||||||||
| Poison
|
Resistant | Lightning
|
Resistant | |||||||||||||||||||
| Holy
|
Resistant | Dark
|
Resistant | |||||||||||||||||||
| Physical
|
Resistant | Undead?
|
No | |||||||||||||||||||
| Other | ||||||||||||||||||||||
| Category | Enchanted | |||||||||||||||||||||
| Fixed Damage | 1,000 | |||||||||||||||||||||
| Equipment Drops | ||||||||||||||||||||||
| Usable Drops |
| |||||||||||||||||||||
| Set-up Drops | None | |||||||||||||||||||||
| Etc. Drops |
| |||||||||||||||||||||
| Quest Drops | None | |||||||||||||||||||||
| Locations | Where Will is Forged | |||||||||||||||||||||
Extreme
Extreme difficulty was added into the game during the Assemble / Every Little Thing Every Precious Thing Update Part 3. It has a total of 32,180,000,000,000,000 (32.18 quadrillion) HP.
Extreme: Phase 1
Required SAC / AUT: ⬢340
| Adversary's Valor (Boss)
| ||||||||||||||||||||||
|
| ||||||||||||||||||||||
| Level | 290 | HP | 9,655,000,000,000,000[1] | MP | 100,000 | EXP | 0 | |||||||||||||||
|---|---|---|---|---|---|---|---|---|---|---|---|---|---|---|---|---|---|---|---|---|---|---|
| Attack | 22,000 | Defense Rate | PDR: 380% MDR: 380% |
Speed | -20 | Additional Points | None | |||||||||||||||
| Elements | ||||||||||||||||||||||
| Fire
|
Resistant | Ice
|
Resistant | |||||||||||||||||||
| Poison
|
Resistant | Lightning
|
Resistant | |||||||||||||||||||
| Holy
|
Resistant | Dark
|
Resistant | |||||||||||||||||||
| Physical
|
Resistant | Undead?
|
No | |||||||||||||||||||
| Other | ||||||||||||||||||||||
| Category | Enchanted | |||||||||||||||||||||
| Equipment Drops | None | |||||||||||||||||||||
| Usable Drops | None | |||||||||||||||||||||
| Set-up Drops | None | |||||||||||||||||||||
| Etc. Drops | None | |||||||||||||||||||||
| Quest Drops | None | |||||||||||||||||||||
| Locations | Bountiful Bravery | |||||||||||||||||||||
Extreme: Phase 2
Required SAC / AUT: ⬢340
| Adversary's Conviction (Boss)
| ||||||||||||||||||||||
|
| ||||||||||||||||||||||
| Level | 290 | HP | 9,655,000,000,000,000[1] | MP | 100,000 | EXP | 0 | |||||||||||||||
|---|---|---|---|---|---|---|---|---|---|---|---|---|---|---|---|---|---|---|---|---|---|---|
| Attack | 22,000 | Defense Rate | PDR: 380% MDR: 380% |
Speed | Stationary | Additional Points | None | |||||||||||||||
| Elements | ||||||||||||||||||||||
| Fire
|
Resistant | Ice
|
Resistant | |||||||||||||||||||
| Poison
|
Resistant | Lightning
|
Resistant | |||||||||||||||||||
| Holy
|
Resistant | Dark
|
Resistant | |||||||||||||||||||
| Physical
|
Resistant | Undead?
|
No | |||||||||||||||||||
| Other | ||||||||||||||||||||||
| Category | Enchanted | |||||||||||||||||||||
| Equipment Drops | None | |||||||||||||||||||||
| Usable Drops | None | |||||||||||||||||||||
| Set-up Drops | None | |||||||||||||||||||||
| Etc. Drops | None | |||||||||||||||||||||
| Quest Drops | None | |||||||||||||||||||||
| Locations | Truth in Wisdom | |||||||||||||||||||||
Extreme: Phase 3
Required SAC / AUT: ⬢340
| First Adversary (Boss)
| ||||||||||||||||||||||
|
| ||||||||||||||||||||||
| Level | 290 | HP | 12,870,000,000,000,000[1] | MP | 100,000 | EXP | 0 | |||||||||||||||
|---|---|---|---|---|---|---|---|---|---|---|---|---|---|---|---|---|---|---|---|---|---|---|
| Attack | 22,000 | Defense Rate | PDR: 380% MDR: 380% |
Speed | -20 | Additional Points | None | |||||||||||||||
| Elements | ||||||||||||||||||||||
| Fire
|
Resistant | Ice
|
Resistant | |||||||||||||||||||
| Poison
|
Resistant | Lightning
|
Resistant | |||||||||||||||||||
| Holy
|
Resistant | Dark
|
Resistant | |||||||||||||||||||
| Physical
|
Resistant | Undead?
|
No | |||||||||||||||||||
| Other | ||||||||||||||||||||||
| Category | Enchanted | |||||||||||||||||||||
| Equipment Drops | None | |||||||||||||||||||||
| Usable Drops | None | |||||||||||||||||||||
| Set-up Drops | None | |||||||||||||||||||||
| Etc. Drops | None | |||||||||||||||||||||
| Quest Drops | None | |||||||||||||||||||||
| Locations | Fated to be Legend | |||||||||||||||||||||
Extreme: Reward
| World Heart (Boss) | ||||||||||||||||||||||
|
| ||||||||||||||||||||||
| Level | 290 | HP | 100,000 | MP | 10,000,000 | EXP | 0 | |||||||||||||||
|---|---|---|---|---|---|---|---|---|---|---|---|---|---|---|---|---|---|---|---|---|---|---|
| Attack | 22,000 | Defense Rate | PDR: 380% MDR: 380% |
Speed | Stationary | Additional Points | Ambition EXP: 388 Weapon Points: 300 Guild Points: 3,000 Party GP Bonus: 6,000 | |||||||||||||||
| Elements | ||||||||||||||||||||||
| Fire
|
Resistant | Ice
|
Resistant | |||||||||||||||||||
| Poison
|
Resistant | Lightning
|
Resistant | |||||||||||||||||||
| Holy
|
Resistant | Dark
|
Resistant | |||||||||||||||||||
| Physical
|
Resistant | Undead?
|
No | |||||||||||||||||||
| Other | ||||||||||||||||||||||
| Category | Enchanted | |||||||||||||||||||||
| Fixed Damage | 1,000 | |||||||||||||||||||||
| Equipment Drops | ||||||||||||||||||||||
| Usable Drops |
| |||||||||||||||||||||
| Set-up Drops | None | |||||||||||||||||||||
| Etc. Drops |
| |||||||||||||||||||||
| Quest Drops | None | |||||||||||||||||||||
| Locations | Where Will is Forged | |||||||||||||||||||||
Story
Required SAC / AUT: ⬢100
| First Adversary (Boss)
| ||||||||||||||||||||||
|
| ||||||||||||||||||||||
| Level | 270 | HP | 2,100,000,000,000[1] | MP | 100,000 | EXP | 0 | |||||||||||||||
|---|---|---|---|---|---|---|---|---|---|---|---|---|---|---|---|---|---|---|---|---|---|---|
| Attack | 22,000 | Defense Rate | PDR: 380% MDR: 380% |
Speed | -20 | Additional Points | None | |||||||||||||||
| Elements | ||||||||||||||||||||||
| Fire
|
Resistant | Ice
|
Resistant | |||||||||||||||||||
| Poison
|
Resistant | Lightning
|
Resistant | |||||||||||||||||||
| Holy
|
Resistant | Dark
|
Resistant | |||||||||||||||||||
| Physical
|
Resistant | Undead?
|
No | |||||||||||||||||||
| Other | ||||||||||||||||||||||
| Category | Enchanted | |||||||||||||||||||||
| Equipment Drops | None | |||||||||||||||||||||
| Usable Drops | None | |||||||||||||||||||||
| Set-up Drops | None | |||||||||||||||||||||
| Etc. Drops | None | |||||||||||||||||||||
| Quest Drops | None | |||||||||||||||||||||
| Locations | As Legend Reborn | |||||||||||||||||||||
Gallery
-
 First Adversary Maple Guide icon
 -
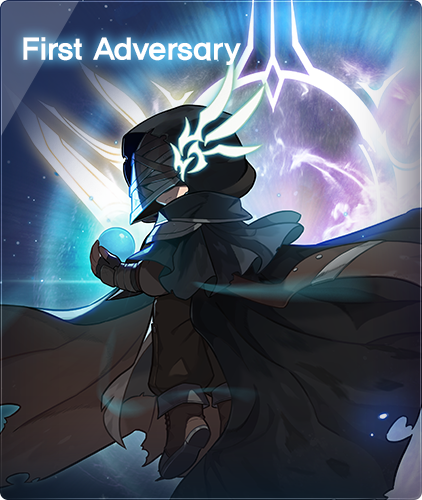 First Adversary Boss UI artwork
 -
 First Adversary Boss Entry UI artwork
 -
First Adversary Boss Entry UI artwork (animated)
-
 First Adversary's Soul Effect
 -
 Magnificent First Adversary's Soul Effect
 -
 First Adversary Soul Collector Artwork
... -
 First Adversary Soul Collector Artwork
(all souls added)
...


.png)
.png)
.png)
Trivia
- First Adversary is the first boss that received animated artwork in the Boss Entry UI, followed by Malitia.
References
| Monsters | |||||||
|---|---|---|---|---|---|---|---|
| Monsters | |||||||
| 1 - 10 | 11 - 20 | 21 - 30 | 31 - 40 | 41 - 50 | 51 - 60 | ||
| 61 - 70 | 71 - 80 | 81 - 90 | 91 - 100 | 101 - 110 | 111 - 120 | ||
| 121 - 130 | 131 - 140 | 141 - 150 | 151 - 160 | 161 - 170 | 171 - 180 | ||
| 181 - 190 | 191 - 200 | 201 - 210 | 211 - 220 | 221 - 230 | 231 - 240 | ||
| 241 - 250 | 251 - 260 | 261 - 270 | 271 - 280 | 281 - 290 | 291 - 300 | ||
| Major Bosses | |||||||
| Area Bosses | |||||||
| Root Abyss | |||||||
| Elite Bosses | |||||||
| Black Mage and his commanders | |||||||
| Grandis | |||||||
| Special Content | |||||||
| Overseas Exclusive | |||||||
| Quest Monsters | |||||||
| 1 - 10 | 11 - 20 | 21 - 30 | 31 - 40 | 41 - 50 | 51 - 60 | ||
| 61 - 70 | 71 - 80 | 81 - 90 | 91 - 100 | 101 - 110 | 111 - 120 | ||
| 121 - 130 | 131 - 140 | 141 - 150 | 151 - 160 | 161 - 170 | 171 - 180 | ||
| 181 - 190 | 191 - 200 | 201 - 210 | 211 - 220 | 221 - 230 | 231 - 240 | ||
| 241 - 250 | 251 - 260 | 261 - 270 | 271 - 280 | 281 - 290 | 291 - 300 | ||
| Other Monsters | |||||||
|
Mu Lung Dojo • Monster Park • Party Quest • Mirror World • Maple Tour • Tower of Oz • Special • Theme Dungeons • Epic | |||||||


